Team – Regular Shifts
Adding a Regular Shifts
How to add “”Add New Regular Shift” in the Regular shifts for employees
List of Employees –> Employee File –> Regular Shifts –> Add New Regular Shift
Click on the Team tab drop icon on the left side panel
After that, you will see three options: List of Employees, Team Route Mapping, and Absence list.
Click on the “List of Employees” Tab
Now the list of employee page will show
On the “list of employees” page, that employee will be shown which is created already
The “Regular Shift” tab will be shown on the sixth number, the right-hand side of the personal details tab
Click on the “Regular Shift” tab
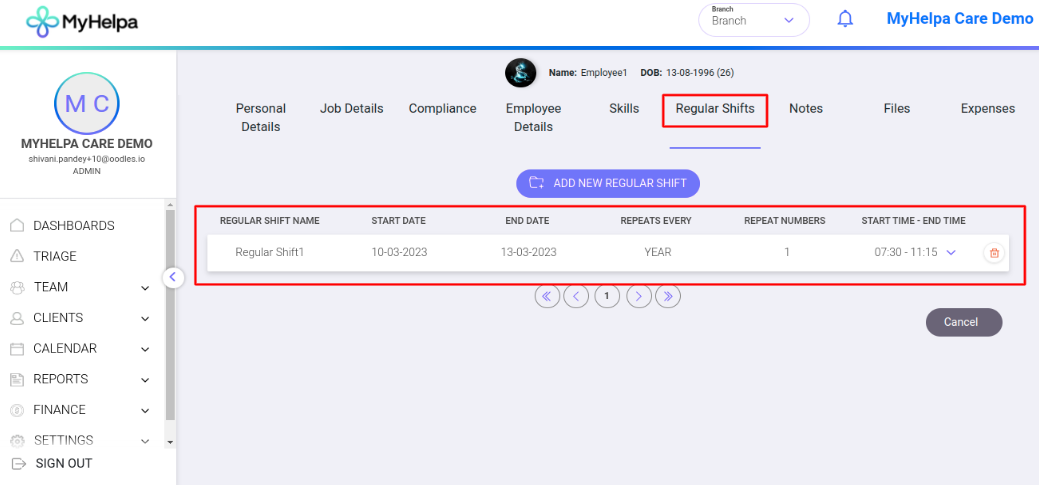
On clicking the “Regular Shift” tab, the page will open

Click on the “Add New Regular Shift” button
On clicking the “Add New Regular Shift” button, the regular shift field will be shown
Fill in all the mandatory fields and the fields which you want to fill
TOP TIPS
1) Name the Regular shift with something that is useful on reports
2) Complete the start date (the end date is usually left blank)
3) Choose the repeat pattern – this is usually “weekly” and the repeat pattern “1” or “2” or other number and the End is usually “Never”
4) The Shift Type can be from the dropdown and this is most often “Availability” choose times and days
5) You can add a split shift here by clicking on the “+” icon so it gives customisation in times e.g. 7-1pm and then again 5pm-10pm
6) You can also add in the preferred regular “unavailable” days for any regular day off pattern
Click on the save button on clicking save button. All the fields are saved successfully
You can add multiple regular shifts, by clicking the “Add New Regular Shift” button
Editing a Regular Shifts
On clicking the “Regular Shift” tab, the page will open
Now you will see the regular shift which you made earlier on the page – select the regular shift you wish to edit
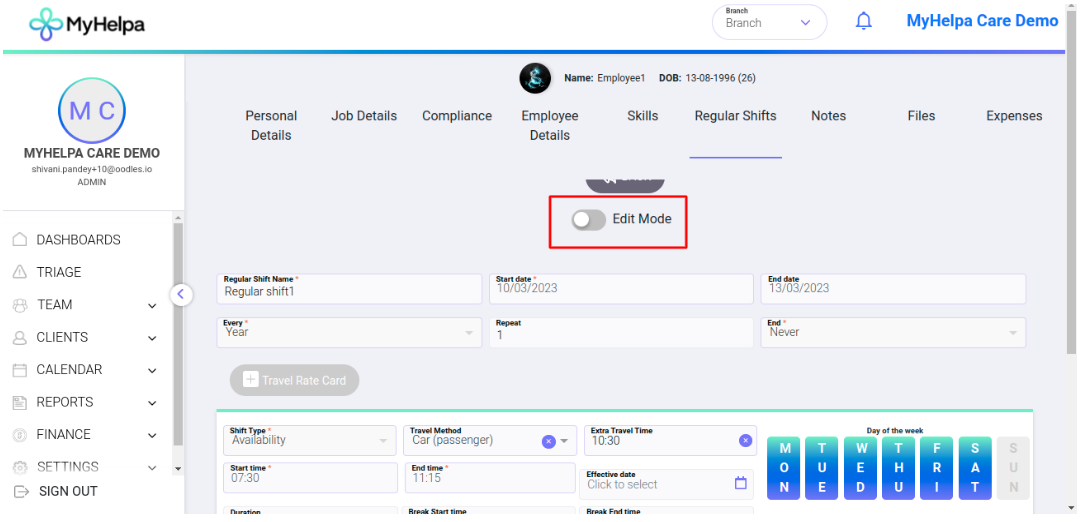
Select the toggle button of “edit mode”
After that, you can edit any field be sure to add an effective date for when you want the change to apply
On clicking the save button, whatever field is edited will be saved
Ending a Regular Shifts
To end the regular shift open it up and select the appropriate end date at the top right hand side. It is also good practice to end the repeat pattern – change the End to On and a date pops up – add the end date here too. Also add the end date as the effective date next to the times.
Click save. A warning message will pop up to warn about the effective dates of the changes.
Deleting a Regular Shifts
Deleting regular shifts is NOT recommended. If you do wish to delete a regular shift make sure that there is an end date on the regular shift.
You will receive a warning pop up prior to proceeding.